 kanarche
Build your own air quality sensor
Kanarche shows readings from citizen sensors in the Sensor.Community network. If there is no sensor near you, you can build your own. Follow the six steps in order. You will need a computer and a soldering iron. If you would rather not assemble one, you can adopt a ready-made station.
1What you need
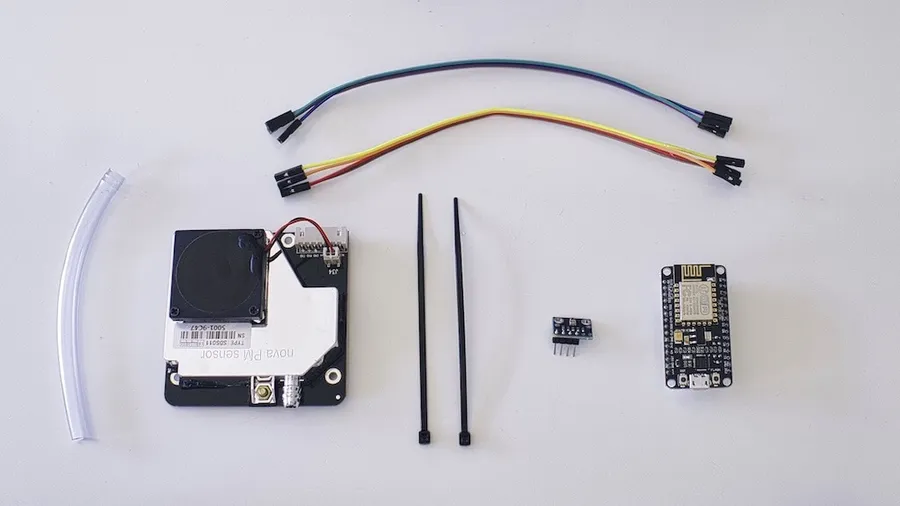
- A NodeMCU development board with an ESP8266 microcontroller. The Sensor.Community guide is written for version 3. You can tell it by the pins marked VU and G.
- An SDS011 particulate matter sensor.
- A BME280 sensor for temperature, humidity and pressure, with a pin header.
- Dupont cables with female connectors at both ends.
- A USB data cable that fits the board, and a USB power supply.
- Two cable ties.
- A flexible tube 6 mm wide and about 20 cm long, opaque if possible.
- Two plastic pipe bends 75 mm wide. They keep the electronics out of the weather.
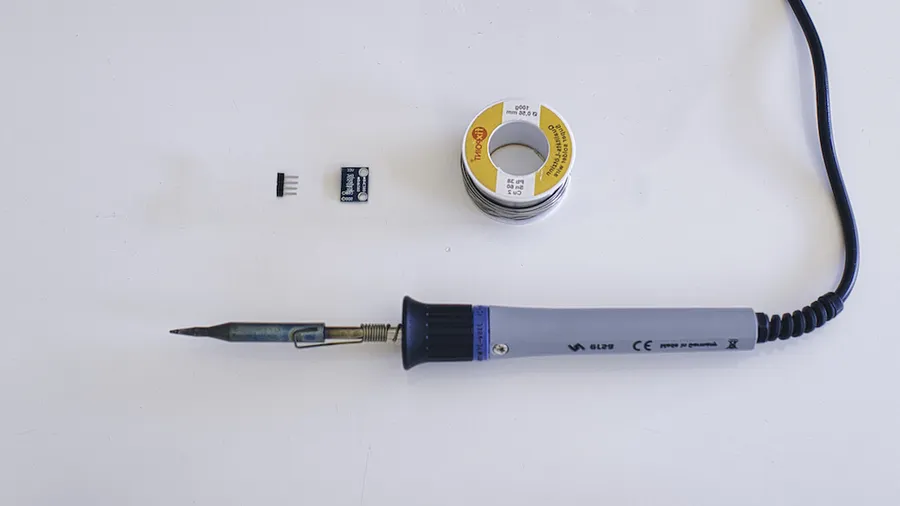
- A soldering iron and solder for the BME280 pins.
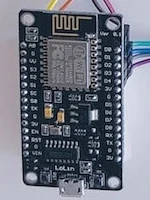
Which USB cable? Newer ESP8266 boards have USB-C. Older ones have micro-USB. Look at the socket on your board and get a cable with the same plug. The cable must carry data. With a charge-only cable the computer will not see the board.
2Flash the firmware
The firmware is the program that runs the station. Sensor.Community provides it ready to use and you only upload it to the board. Do this before you assemble anything.
- Install the driver for the USB chip on the board. The chip is CP2102 on NodeMCU V2 and CH340 or CH341 on V3. The marking is on the back of the board. Windows 10 usually downloads the driver by itself. Linux needs no driver.
- Download the flashing program from
firmware.sensor.community/airrohr/flashing-tool. It is called airRohr Flashing Tool. There are versions for Windows, macOS and Linux. - Connect the board to your computer with a USB cable shorter than one metre. A longer cable can make the upload fail.
- Start the program. The "Board" field must show the port of your board.
- In the "Firmware version" field, pick
latest_en.binfor an English interface orlatest_bg.binfor Bulgarian.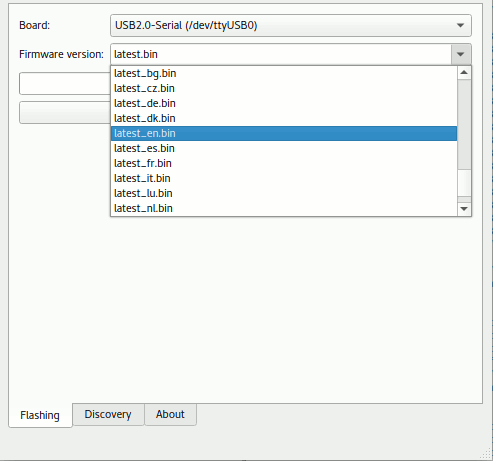
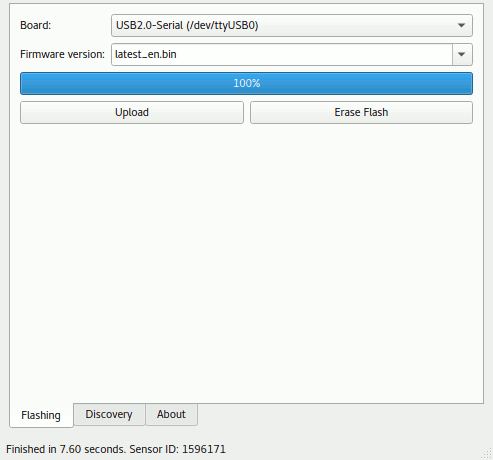
- Press "Upload". The upload takes a few seconds.
- When the bar reaches 100%, the bottom line shows "Finished" and "Sensor ID" with a number. Write the number down. It is your ChipID and you need it to register.
If the program does not start
- On macOS, open it with a right click and "Open". You may have to do this several times.
- If macOS says "No boards found", restart the computer.
- On Linux, make the file executable. If you get an error about the port
ttyUSB0, add your user to thedialoutgroup, then log out and log in again.
3Assemble the station
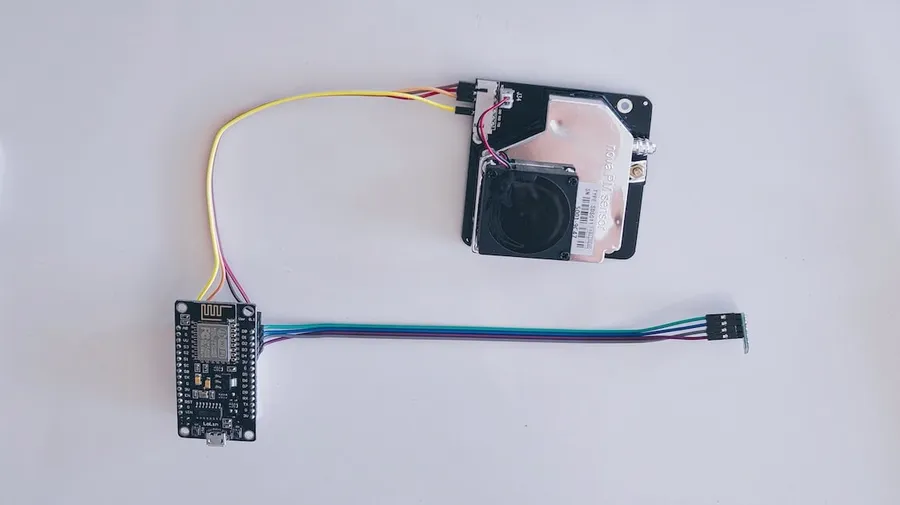
Wire the sensors
You wire everything with Dupont cables. The connectors slip between two pins easily. Check that each one sits on its own pin.
| SDS011 pin | Label on the diagram | NodeMCU pin |
|---|---|---|
| 1 | TXD | D1 |
| 2 | RXD | D2 |
| 3 | GND | GND |
| 5 | 5V | VU (VIN on versions 1 and 2) |
| 4, 6, 7 | not connected |
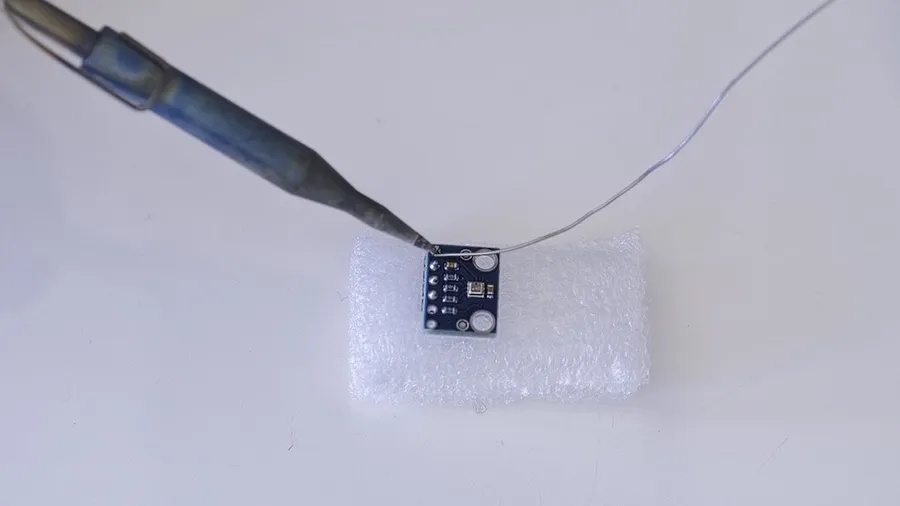
Solder the header to the BME280 before you wire it:
- Push the header through the holes of the BME280 board.
- Solder from the back side.
- Touch the tip of the iron to the pin and warm it briefly. Then add a little solder.
- Work slowly. The gaps between the pins are very small.
| BME280 pin | NodeMCU pin |
|---|---|
| VIN | 3V3 |
| GND | GND |
| SDA | D3 |
| SCL | D4 |

Put it in the pipe
- Tie the board to the SDS011 with a cable tie. The WiFi antenna must point away from the sensor.
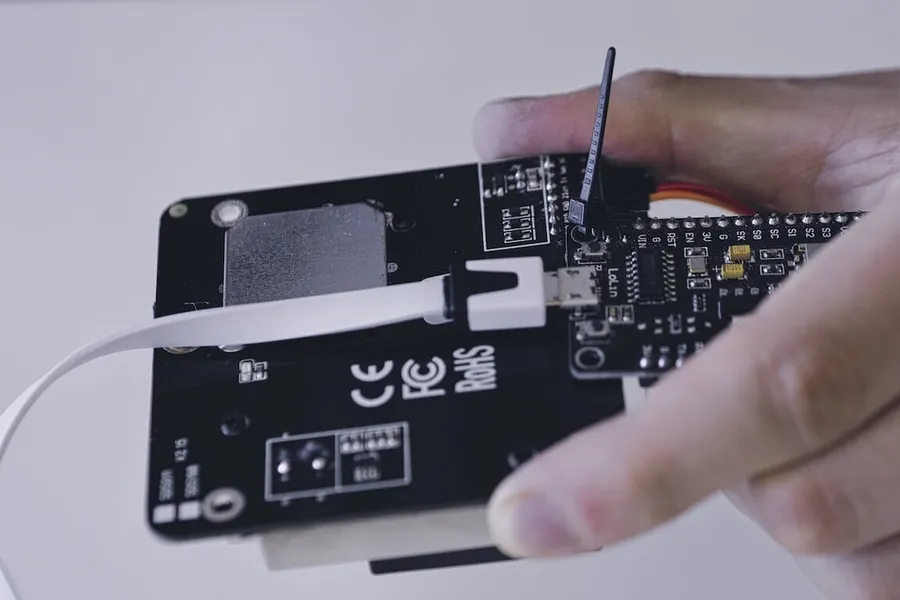
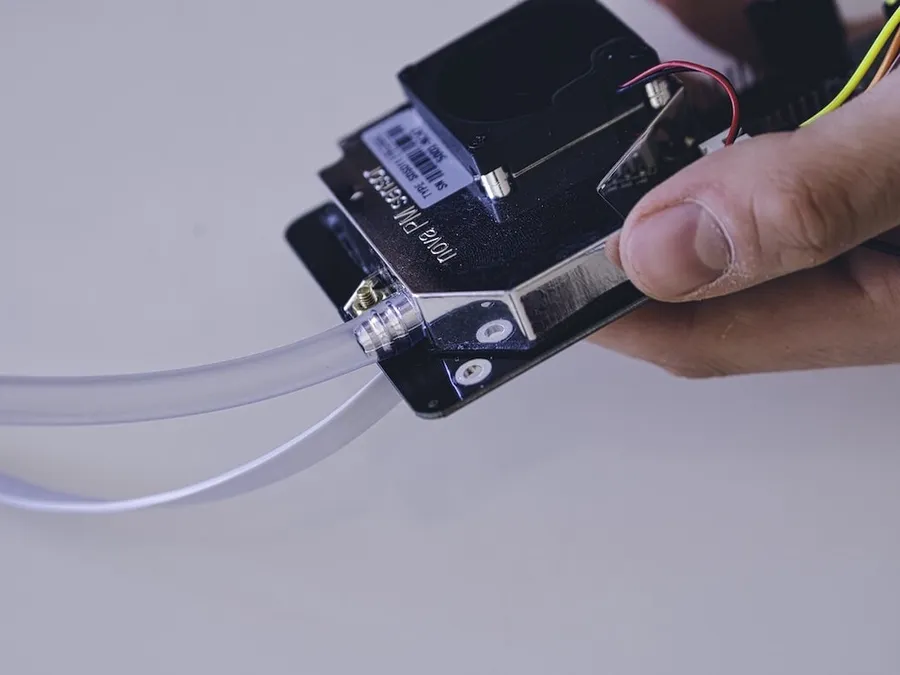
- Fit the flexible tube onto the opening of the SDS011.
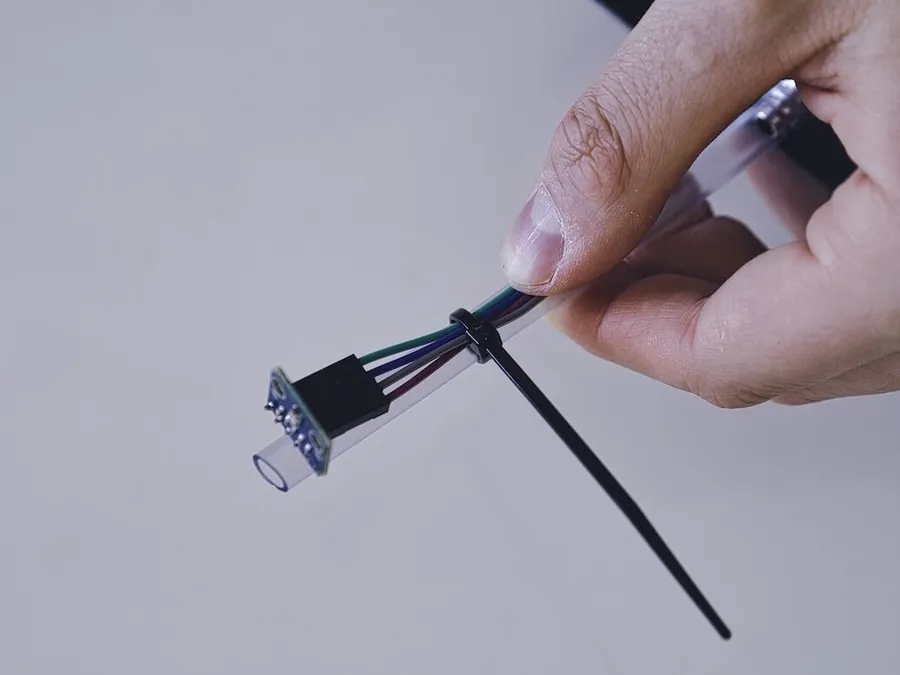
- Use the second cable tie to fasten the BME280 to the tube.
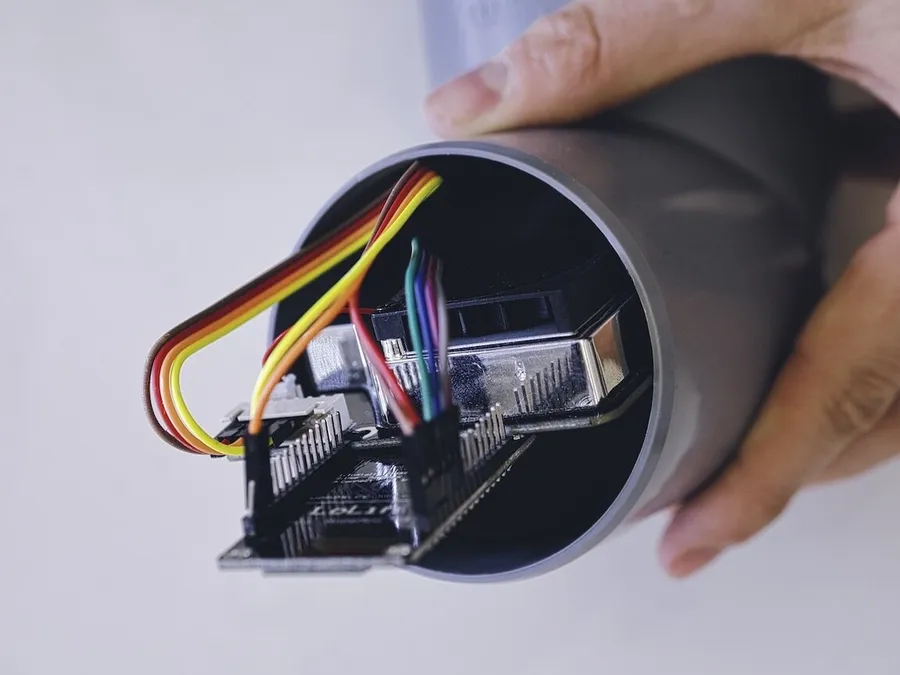
- Pass the USB cable through the first bend and plug it into the board.
- Push the parts into the bend until they jam. The board faces up and the SDS011 fan faces down. The USB cable, the tube and the BME280 stick out of the end of the bend.
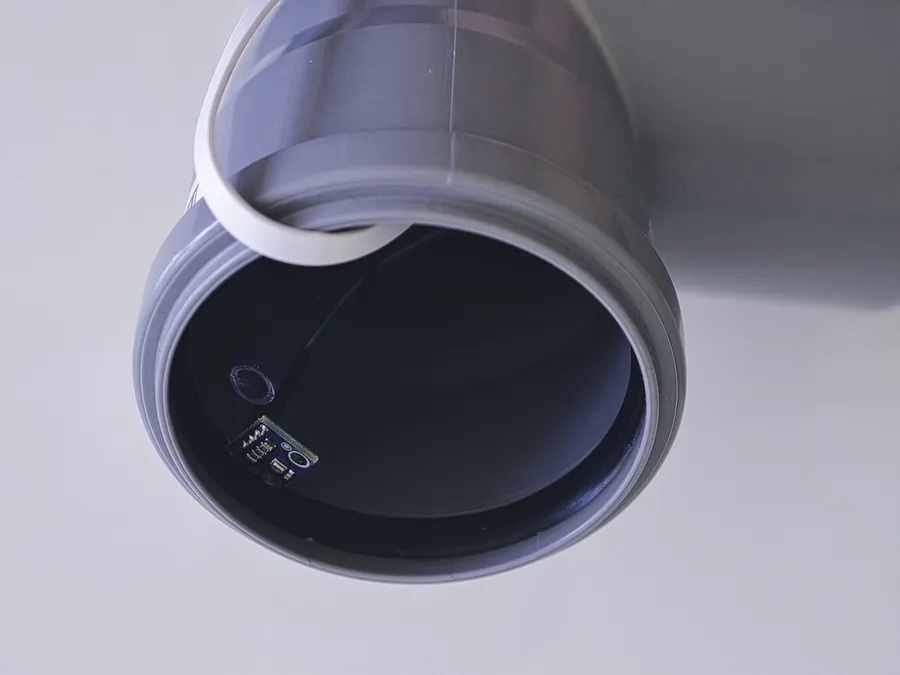
- Push the second bend onto the first.
- Set the BME280 at the edge of the pipe. Cut the tube where the pipe ends.
- If you like, cover the open ends with a fine mesh. Air gets through and insects stay out.
Choose a place
The best spot is 1.5 to 3.5 metres above the street with good airflow. If you have no such spot, put the station where you can. When you register, you describe the height and the position relative to the street.
4Connect it to WiFi
- Plug the station into the USB power supply.
- The station starts its own WiFi network. The name begins with
airRohr,FeinstaubsensororParticulate Matterand ends with a number. The number is your ChipID. - Join that network from a phone or a computer. The password is
airrohrcfg. - Open the address
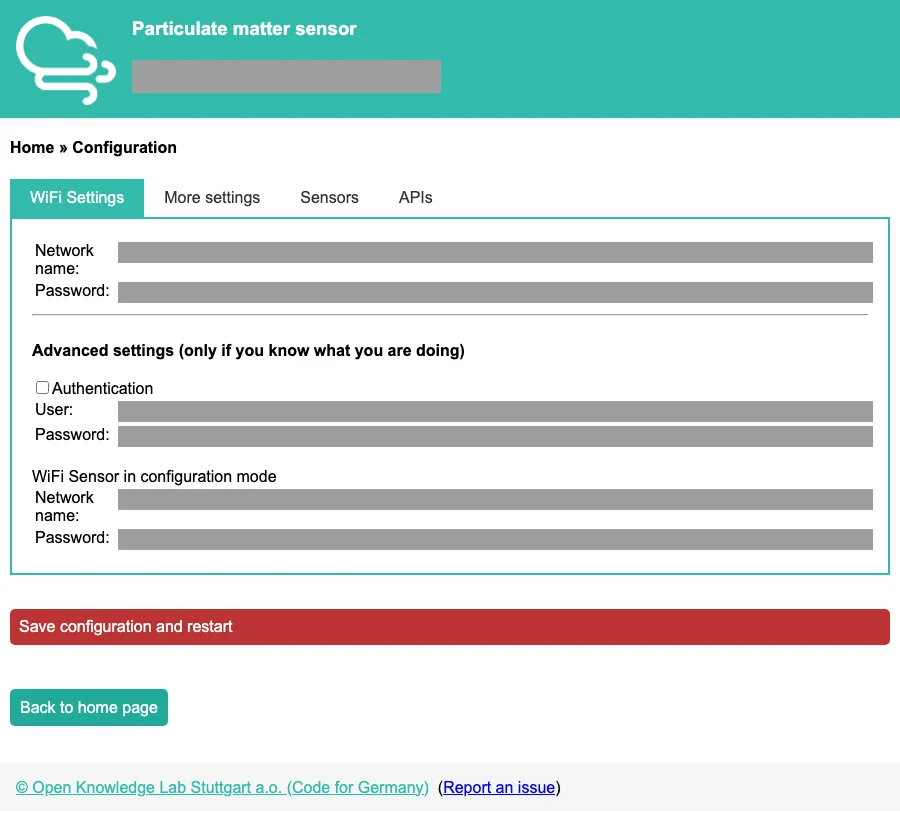
192.168.4.1in a browser. You will see the station home page. The screenshots here are from the English version.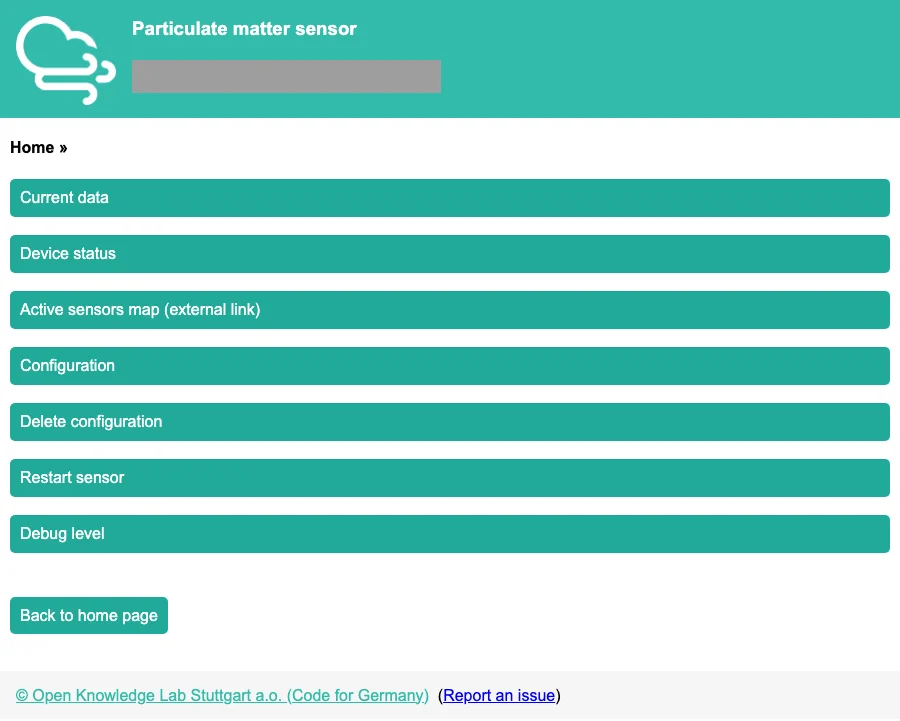
- Choose "Configuration". On the "WiFi Settings" tab, fill in "Network name" with the name of your home network and "Password" with its password.
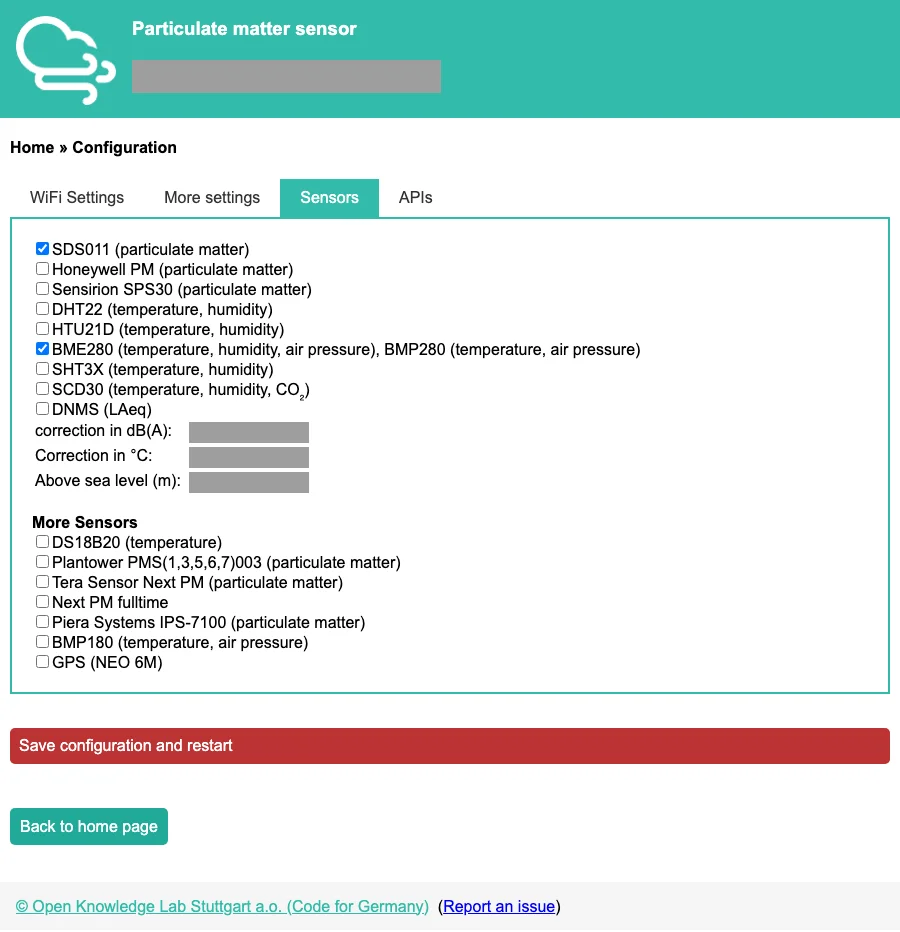
- If you use the SDS011, leave the other tabs as they are. Sensor.Community must be ticked under "APIs".
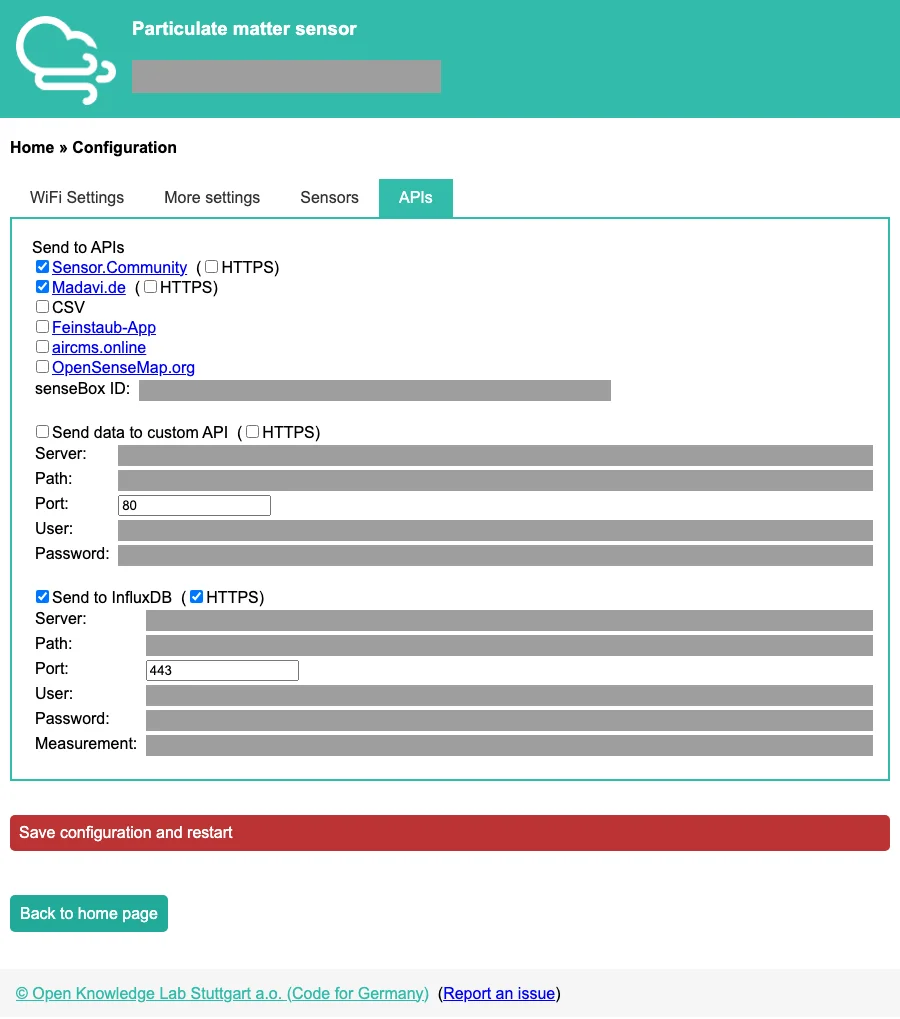
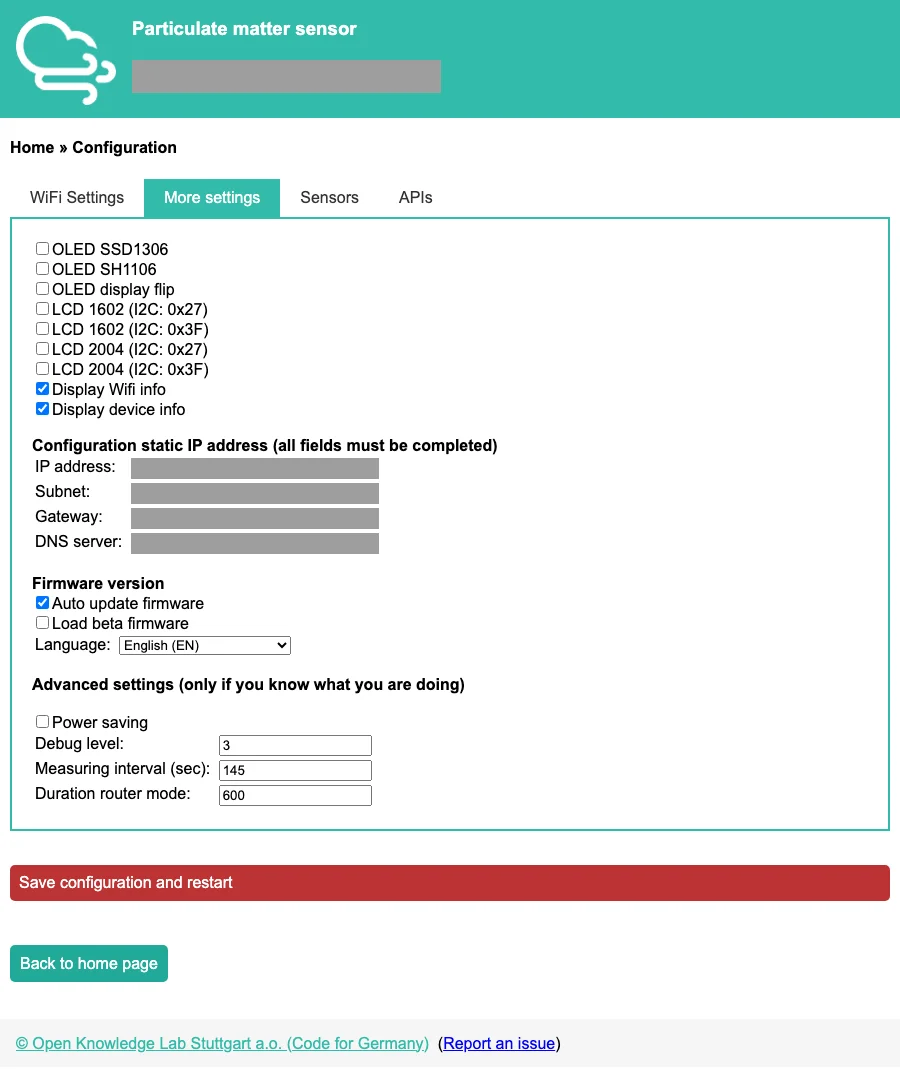
- Press "Save configuration and restart". The station restarts and joins your home network. Its own network disappears and the address
192.168.4.1stops working. Sometimes it takes a few tries. - The station starts measuring and sending data.
Android phone? If the connection to the station drops at once, turn off the "Smart network switch" option in the advanced WiFi settings.
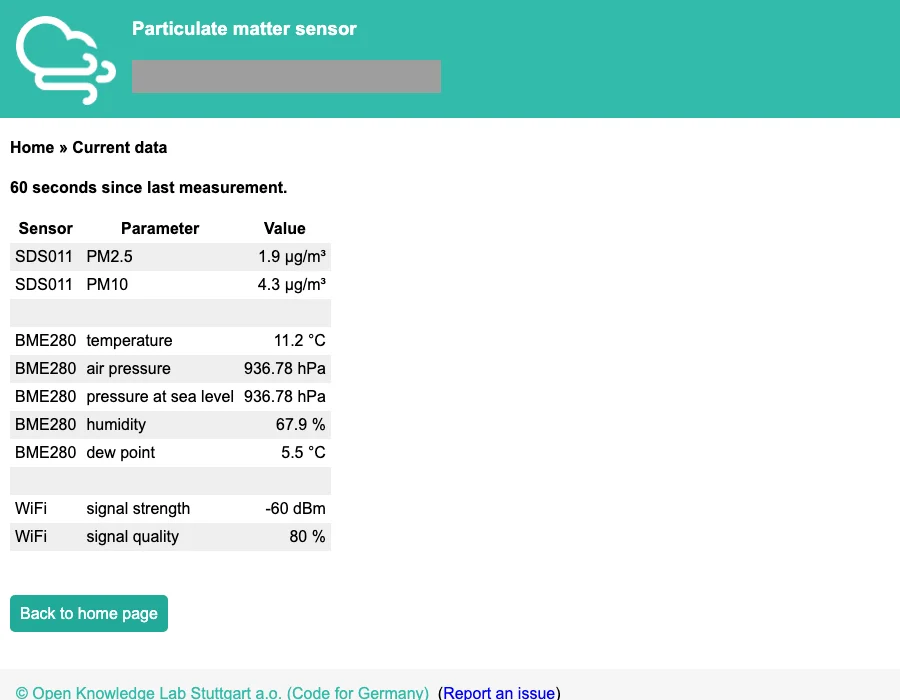
How to find it again. The station is now on your home network with an address from the router. Open the device list in your router, find the station and type its address into a browser. You can also find it from the "Discovery" tab of the flashing program. The "Current data" page shows the latest measurement.
5Register the sensor
- Open
devices.sensor.communityand create an account. - Log in. Under "Sensors", choose "Register new sensor".
- In the Sensor ID field, enter your ChipID. It is the only number you need.
- Enter an email address. It is not published.
- Enter an address with street, house number, postcode and city. Press "Lookup entered address". The form finds the coordinates and rounds them.
- Check that the pin on the map is in the right place. Move it if needed.
- Give the sensor a name. This helps if you have more than one.
- Describe the place: the height above ground, which side of the street it is on, whether traffic is heavy.
6If something does not work
| What you see | What to do |
|---|---|
| The firmware upload fails | Use a cable shorter than one metre. Check the driver. |
| The station shows no sign of life | Check the power supply and the USB cable. Unplug the cable and plug it in again. Replace the power supply if needed. |
| It does not join your home network | In the first minutes after a restart the station starts its own network again. It can take one to two minutes to appear. Join it and enter the network name and password again. |
| You do not know if it is on the network | Look for it in the device list of your router. If it is there, open its address in a browser. If it is missing, weak power can be the cause. |
| The SDS011 does not measure | Take the electronics out of the pipe. After a restart the red LED on the SDS011 should be lit and the fan should spin. Check the cables to the sensors and replace them if needed. |
| The station works but is missing from the map | Check that it is registered at devices.sensor.community and visible on the Sensor.Community map. A weak WiFi signal can also be the cause. |
For advanced users
Connect the station to a computer and open the serial port with a terminal program at 9600 baud, setting 8N1. It shows what the station is doing: startup, WiFi connection and measurements. The first measurement comes after about three minutes.
How your sensor reaches Kanarche
The station sends its readings to Sensor.Community. Kanarche fetches new readings from there every 5 minutes. We publish a value for a city or province when at least three separate locations report usable readings.
Frequently asked questions
Do I need to know how to solder?
A little. Only the BME280 pins are soldered. Everything else is wired with Dupont cables.
Can I have a station without building it?
Yes. You can adopt a ready-made station and put it on your balcony or wall.
When will my sensor appear on Kanarche?
Once it is registered and sends data to Sensor.Community. Kanarche fetches new readings every 5 minutes.
Why is my sensor hidden?
It is inactive when it has sent nothing for 2 hours. It is faulty when at least half of its readings in the last 24 hours failed the quality checks. Both are hidden by default. You can show them from Layers.
This page follows the Sensor.Community guide to building a station. The photos and the diagram come from the same guide and from the firmware flashing program. Read the original guide. Copyright (c) 2020 Sensor.Community and Community, MIT licence. Wiring diagram: roman-minyaylov, MIT licence. Kanarche is an independent project and is not affiliated with Sensor.Community. The flashing program screenshots are from airrohr-firmware-flasher, Copyright 2018 Piotr Dobrowolski, MIT licence.